So it’s the weekend and I’m setting idly sipping my morning coffee thinking of what to do today when my eyes spotted my Raspberry Pi’s collecting dust being shelved as I’ve been quite busy lately for the past 6 months with the arrival of my baby daughter (Luna) to this world, who by the way kept me awake the last night hence I’ve no energy to go out today. So how about a quick project instead? How about trying running PowerFx on one of those Raspberry Pi’s?
It happens that Microsoft had quite recently released the source code of PowerFx after some good long wait since they promised doing so last March. You see, PowerFx is the underlying low code programming language for PowerApps and by Microsoft letting us lay our hands on its source code open so many doors for potential good things to come next.
In order to run PowerFx you will need to build and run it using the .net SDK, which means you will first need to install it and configure first. Then using Git, clone the PowerFx sample repo which have command like interpreter that works Python like.
So this morning I’ve spent some time trying different approaches to install .net core on Raspberry Pi as there is no official .net core installer for it (yet?) from Microsoft, and the snap didn’t work for some reason. I’m going to detail below the only way that did work for me and hopefully it would work for you as well.
For simplicity, I’m using a headless (i.e. without GUI Desktop) Raspberry Pi Raspbian Buster installation which is based on Debian Linux. To start, connect to your Raspi using your favorite SSH client. If you are a Linux user like myself, then simply open your terminal and start typing the below shell commands.
ssh pi@raspberrypi.local
After typing your password and accepting machine fingerprint if you haven’t done so before, it’s alway a good idea to update and upgrade your packages. You may skip this step if you have done so recently. This is going to take a while, so maybe it’s a good time to get yourself some coffee.
sudo apt update
sudo apt full-upgrade
Also since we will be using git to clone PowerFx repo to Raspberry Pi we will also need to install Git like below.
sudo apt install git
Now it’s time to install .net SDK using a bash script provided by Microsoft for this purpose. You will first need to download the script using wget.
wget https://dot.net/v1/dotnet-install.sh
By now you have the script downloaded in your home folder. You will need make this script executable in order to run in bash as following
chmod +x dotnet-install.sh
./dotnet-install.sh
If you run the bash script this way it’s going to install the latest release of .net core which at the time of writing this article is 6.0. It so happens though that the current PowerFx sample code on github targets an older framework which is 3.1. You can specify the older version like below or just use the latest version and modify the target framework on the csproj file in PowerFx sample code.
./dotnet-install.sh -c 3.1
The script will run for sometime and in the process it’s going to create a hidden folder with the .net binaries named .dotnet in your home directory. You can navigate to there and run it directly but obviously this is inconvenient, so next we will add an environment variable so you can call it from any path using the command dotnet.
export DOTNET_ROOT=~/.dotnet
export PATH=$PATH:$DOTNET_ROOT
By typing dotnet in the terminal you should get below output confirming that the .net SDK installation have been successful.

Now we have .net core ready, it’s time to clone PowerFx sample repo and build and run it using dotnet command line. We will do so by the following commands.
git clone https://github.com/microsoft/power-fx-host-samples.git
This will take a minute which after you will have a folder in your home directory containing the sample code to PowerFx with Nuget references to PowerFx release binaries.
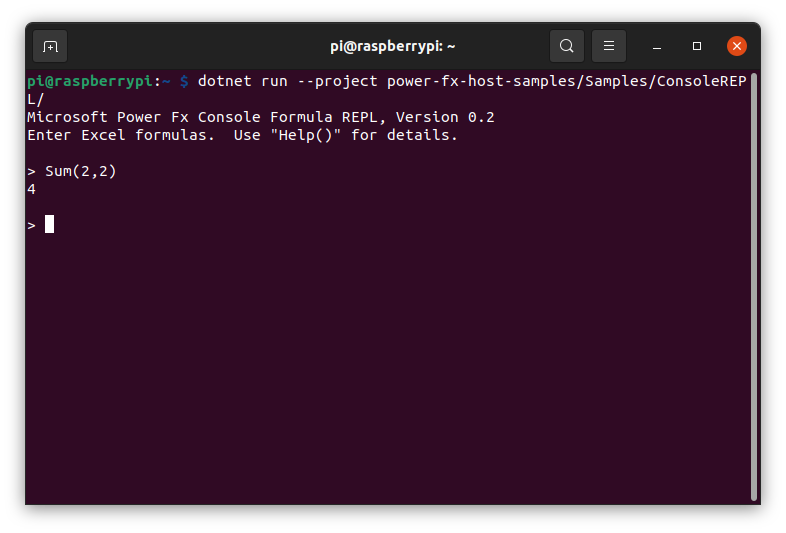
Now moment of truth! Time to build and run the sample repo..
dotnet run –project power-fx-host-samples/Samples/ConsoleREPL/

Hope you enjoyed this project and learnt something new from it, if so, I would appreciate it if you share this article with a friend who might enjoy it as well. Also, please don’t hesitate to give me a shout if you need any help with the steps on this article or if you have some thoughts to share about this project. Thanks for reading!
Leave a Reply