Having recently been able to run PowerFx on Linux and eventually on Raspberry Pi made me curious (and a bit greedy?) about how far can I stretch the PowerFx capabilities. You see, PowerFx have been so far so isolated and contained within the realm of Microsoft Power Platform and even by having my hands on its source code, yet I had to wonder what good is it if I can’t connect it to the external world?
Then I had this idea, can I turn into something like Python, with a command line interpreter where you can write scripts and run it from shell? That would be nice, but it so happens that such a command line interpreter for PowerFx does not exist yet! So how about trying to build one? If I manage to get a working interpreter for PowerFx it would be pretty neat.
Let’s start by saying that managing to pull this off on Linux wasn’t exactly straightforward, as getting the correct configuration in place to get this working was quite tricky. So for the sake of experimentation I’m keeping this pretty simple omitting many details as in validation and error handling. So this is by no means production grade code.
I’ve based this command line interpreter on the sample repo used on my previous article. I’ve only made a small modification so it would read script files and ignore lines starting with ‘#’ which we will see why later.
You will see that most of the modification I’ve done is on the Main() where I encapsulated the original code for expression matching and evaluation in a method called ParseLine() and then added command line argument handling and file IO to load scripts as shown below.
 public static void Main(string[] args)
        {
            ResetEngine();

            Console.WriteLine("Microsoft Power Fx Console Formula REPL, Version 0.2");


            if (args.Length > 0)
            {
                foreach (string line in System.IO.File.ReadLines(args[0]))
                    if (line.StartsWith('#'))
                        continue;
                    else ParseLine(line);

                return;
            }

            Console.WriteLine("Enter Excel formulas.  Use \"Help()\" for details.");
            // loop
            while (true)
            {
                // read
                Console.Write("\n> ");
                var expr = Console.ReadLine();

                ParseLine(expr);

            }
        }
I will spare you the copy and paste and provide you the modified repo to clone directly using the below git command
git clone https://github.com/fadyanwar/power-fx-host-samples.gitYou might need however to modify the csproj to have your installed targetframework instead of netcoreapp3.1 shown below or install .net core 3.1 as detailed on my previous article.
  <PropertyGroup>
    <OutputType>Exe</OutputType>
    <TargetFramework>netcoreapp3.1</TargetFramework>
  </PropertyGroup>
Next you will need to build the project using the publish option so all the binaries would be included in a single folder then create a bin folder in your home directory so you can copy that publish folder into it after.
dotnet publish power-fx-host-samples/Samples/ConsoleREPL/
mkdir bin
cp -r power-fx-host-samples/Samples/ConsoleREPL/bin/Debug/netcoreapp5.0/publish/* bin
Confirm that you have everything in place in the new bin folder in your home directly by typing
ls ~/binYou should see the publishing output as below

Also if you execute the ConsoleREPL like below you should see the below output of the sample REPL console which you can exit by typing in Exit()
./bin/ConsoleREPL 
Now the interesting part. You will create a soft link to ConsoleREPL binary file so you can call it with a different name which would be in our case powerfx for our new command line name. Then we will add the folder to our $PATH environment parameter so the system can see it when powerfx is invoked.
cd bin
ln -s ConsoleREPL powerfx
export PATH=$PATH:$HOME/bin
After this you will be able to type powerfx anywhere in shell and get to the REPL console.
Note that if you wish this new command to be available next time you open the shell you will need to add it or your shell .profile or .bashrc files. You might find that the home bin folder is already there. If you type powerfx now in the command line you will get the same output of the ConsoleREPL since the link you had created is pointing at it now.
Next we will create our PowerFx script. Using your prefered text editor copy and paste the below lines into a new file named script.pfx as shown below. I personally prefer nano text editor.
#!bin/powerfx

Text("Hello World!")
When done, save your work and run the below command to make the script executable.
chmod +x script.pfx
Then here is the fun moment. Using your new command line interpreter type in the below command to invoke the script directly.
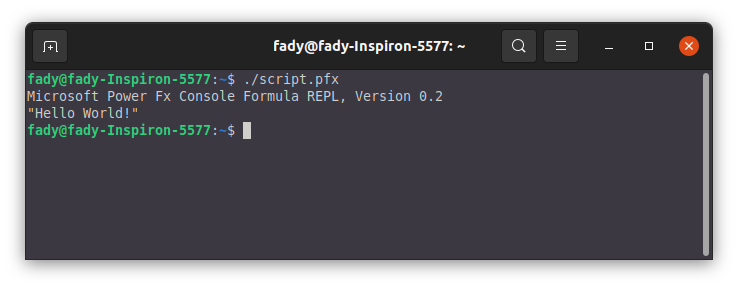
./script.pfx
If all is good, you should get the below result. If so, you have just written and executed your first PowerFx hello world script on Linux, congratulations!

Hopefully you have learnt something new from this article. If so, I would appreciate it if you share it with a friend who might find this interesting. Feel free to play around with this and give me a shout online with your work. I would be more than happy to hear from you and see what have you done with it. Thanks for reading!
Leave a Reply